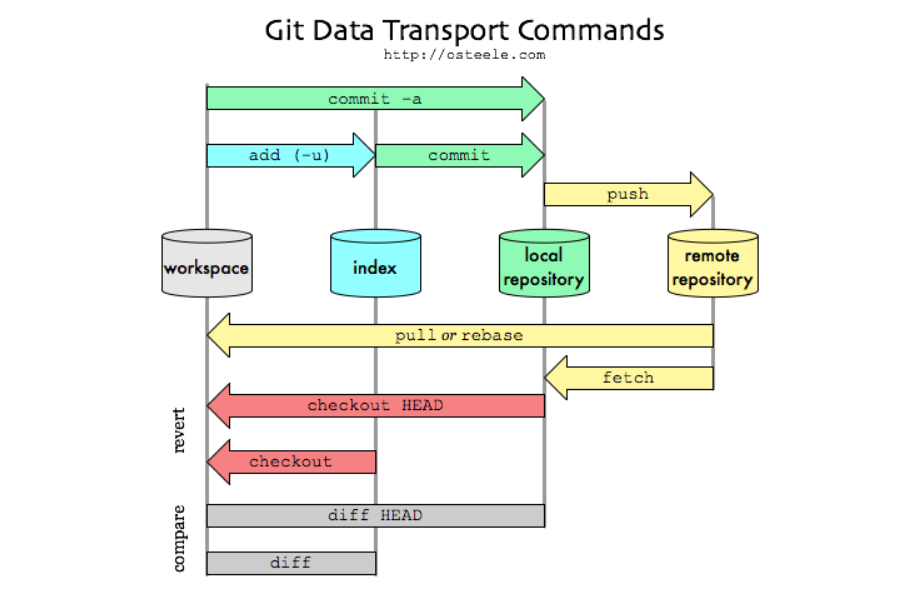
Git 명령어 정리
git 명령어
브랜치
- 브랜치 생성
1
2
git branch branch명 [<from branch>]
ex) git branch ex1 [master] (어느 브랜치를 기준으로 브랜치가 생성이 되었는지 나타낸다. 생략가능)
브랜치 생성 및 checkout 동시에 실행
1
git checkout -b 생성할 branch명
브랜치 확인
1
git branch
명령어 사용하며 원격 저장소의 모든 branch의 명령어를 보여준다.
1
git branch -r
로컬, 원격 모든 저장소의 branch의 리스트를 보여준다.
1
git branch -a
이전 브랜치로 이동
1
git branch -
브랜치로 이동
1
git checkout [branch명]
특정 브랜치의 파일을 원하는 브랜치로 merge 시킨다.
1
2
git checkout -p {merge할 브랜치명} {merge할 파일}
ex) git checkout -p master Hello.java
- 브랜치 병합
- 병합하고자하는 브랜치를 합친다.
- 일반 브랜치를 master 브랜치와 병합
- conflicts를 해결하고 commit을 하여 통합을 완료한다.
1
2
3
4
5
6
git checkout master
git merge branch명

git merge --ff branch명
git merge --no-ff branch명
option)
| 명령어 | 설명 |
|---|---|
| –ff (기본 설정) | 병합 대상 브랜치가 fast-forward 관계인 경우, 병합커밋이 만들지 않고 브랜치 태깅만 변경됨 |
| –no-ff | fast-forward 관계인 경우에도 반드시 병합커밋을 만든다. |
- 브랜치 삭제
1
git branch -d
- 브랜치 이름 변경
- 로컬에서 이름 수정 (원격 저장소에 올리지 않았을 때)
1
git branch -m {변경 전 branch명} {변경하고 싶은 branch명}
- push 전에 Master branch의 이름 변경
- 원격 저장소에서 master 브랜치의 이름을 다르게 지정했다면 처음 push할때 master 브랜치의 이름을 변경해주어야 한다.
- 이름을 변경하지 않으면 2개의 origin이 생성된다.
- Repository 생성 시, 기본 브랜치의 이름을 설정해주는 항목이 추가되었다. 고려하자.
- 원격 저장소에서 master 브랜치의 이름을 다르게 지정했다면 처음 push할때 master 브랜치의 이름을 변경해주어야 한다.
1
git branch -M main
- 원격 저장소에 올렸을 때 (참고사이트)
1
2
3
 - git branch -m {old branch명} {new branch명}
 - git push origin :{old branch명}   // 콜론을 넣는것에 유의하자
 - git push --set-upstream origin {new branch명}
- bash shell에서 브랜치 정보 확인 (참고사이트)
1
git log --branches -- graph -- decorate -- oneline
Add
- Untacked 파일, 디렉토리를 stage에 올림
1
git add .
- Unstage 상태로 변경 (파일을 선택하여 Unstage 상태로 변경한다.)
1
git reset HEAD 파일명
Clone
- 일반적인 클론
1
git clone github 주소
- 전체 브랜치를 클론하지 않고 특정 브랜치만 클론
1
git clone -b {branch_name} --single-branch {저장소 URL}
Commit
에디터를 이용하여 메시지르르 입력할 때
1
git commit
메시지를 입력 후 커밋
1
git commit -m "커밋 메시지"
git add 와 commit을 동시에 한다.
1
git commit -a -m "커밋 메시지"
커밋 로그 변경
- 로컬에서 마지막으로 커밋한 로그를 변경
1
git commit --amend -m "변경을 원하는 로그 작성"
commit을 취소하고 해당 파일들은 staged 상태로 워킹 디렉터리에 보존
1
git reset --soft HEAD^
commit을 취소하고 해당 파일들은 unstaged 상태로 워킹 디렉터리에 보존
1
2
git reset --mixed HEAD^
git reset HEAD^
마지막 2개의 commit을 취소
1
git reset HEAD~2
commit을 취소하고 해당 파일들은 unstaged 상태로 워킹 디렉터리에서 삭제
1
git reset --hard HEAD^
마지막 merge를 취소시키는 명령어
1
git reset --merge [merge 전의 commit hash 값]
gitignore
- gitignore 파일 생성
1
touch .gitignore
ignore 해야할 목록을 추가한다. (gitignore 생성 사이트)
- 스프링 부트에서는 프로젝트 생성 시, 자동적으로 gitignore가 생성됨
gitignore가 적용되지 않는다면 아래의 명령어를 사용하여 cache를 삭제해준다.
1
2
git rm --cached -r .
- 전체 파일을 stage에서 내려준다.
- 위의 명령어를 사용해도 stage에서 내려오지 않는 파일은 직접 명시하여 내려준다.
1
git rm -r {파일명}
- 특정 파일이나 폴더를 추가시키고 싶을때 사용하는 명령어
- 방법1 : 형상관리에 포함하고 싶은 파일의 부모 디렉토리를 모두
!로 제외시켜준다. - 방법2 :
git add -f를 이용하여 stage에 강제로 올린다.
- 방법1 : 형상관리에 포함하고 싶은 파일의 부모 디렉토리를 모두
1
2
3
4
5
6
7
8
# 파일 하나만 추가
!node_modules/axios/lib/core/createError.js

# 디렉토리 추가
!src/main/webapp/WEN-INF/lib/

# 아래의 형태로 추가함
!src/main/webapp/WEN-INF/lib/*.jar
Reset
HEAD를 포함한 이후의 모든 commit이 삭제된다.
- hard를 사용 시, wording directory까지 영향을 받는다.
1
git reset --hard HEAD~
commit 버전을 포함하지 않은 이후의 모든 commit이 삭제 된다.
1
git reset --hard [commit 버전]
원격 저장소에 push한 commit 이후의 commit은 모두 삭제된다.
1
git reset --hard origin/master
Config
이름과 이메일 입력
1
2
3
4
5
6
7
// global config 변경
git config --global user.name "이름 입력"
git config --global user.email "이메일 주소입력"

// local config 변경
git config --local user.name "이름 입력"
git config --local user.email "이메일 주소입력"
config 확인
1
git config --list
기타 리눅스 명령어로 config 확인
1
2
3
4
5
//config에 저장된 이름과 이메일 주소 정보를 확인한다.
cat .gitconfig

// 자장된 이름과 이메일 주소를 지운다.
rm .gitconfig
alias 생성
1
2
# log alias 생성
git config --global alias.lg 'log --graph --oneline --all'
Stash
변경내용 임시저장
1
git stash
원하는 이름으로 stash 저장
1
git stash save [stash명]
stash 목록 보기
1
git stash list
가장 최근 stash 가져오기
1
git stash apply
특정 stash 가져오기
1
git stash apply stash@{1}
가장 최근 stash를 적용하고 동시에 stack에서 지우기
1
git stash pop
특정 stash를 적용하고 동시에 stack에서 지우기
1
git stash pop stash@{1}
가장 최근 stash 지우기
1
git stash drop
특정 stash 지우기
1
git stash drop stash@{1}
Submodule
서브모듈 구성
application.yml을 submodule로 적용하기 위해 작업했다. (보안을 위한 작업)
sub-repo를 생성하고 파일을 push한다.
super-repo에 sub-repo를 등록하기 위해 아래 명령어를 적용한다.
src/main/resources의 하위에 concert-api-config 디렉토리는 생성하지 말고 명령어를 입력하자
git submodule add [sub-repo 주소] [sub-repo가 위치할 경로]

git submodule add https://github.com/futuremaker019/carenet-api-config.git src/main/resources/carenet-api-config
서브모듈 포함한 프로젝트 클론
git clone --recurse-submodules [super-repo git 주소]
명령어를 입력하면 .gitmodules 가 생성되며 path, url을 확인가능하다.
출처 : https://hudi.blog/git-submodule/
submodule이 포함된 프로젝트 클론 명령어
git clone --recurse-submodules [프로젝트 git URL]
위 명령어에서 --recursive--submodules를 명시하지 않고 클론 했을때 아래 명령어를 사용하여 submodule을 최신화 해준다. submodule이 속한 프로젝트를 새로 clone 시 submodule도 같이 로드되도록 만들어주는 명령어
git submodule update --init --recursive
submodule 직접 수정 후 push 한다. push 후 submodule을 pull 한다.
git submodule foreach git pull [원격 리모트명]  [브랜치명]
ex) git submodule foreach git pull origin master
1
2
3
intellij에서 직접 fetch하여 submodule의 origin/master를 최신화 시킴
그 후 명령어
git submodule upate --remote 를 이용하여 detached 된 head를 master 브랜치로 옮김
spring에서 build.gradle에 명시하여 빌드시 submodule을 copy 한다. (gradle build 필요)
tasks.register('copySecret') {
	copy {
		from 'src/main/resources/stock_backend_config'
		include "*.yml"
		into 'src/main/resources'
	}
}
출처 : https://dkswnkk.tistory.com/578
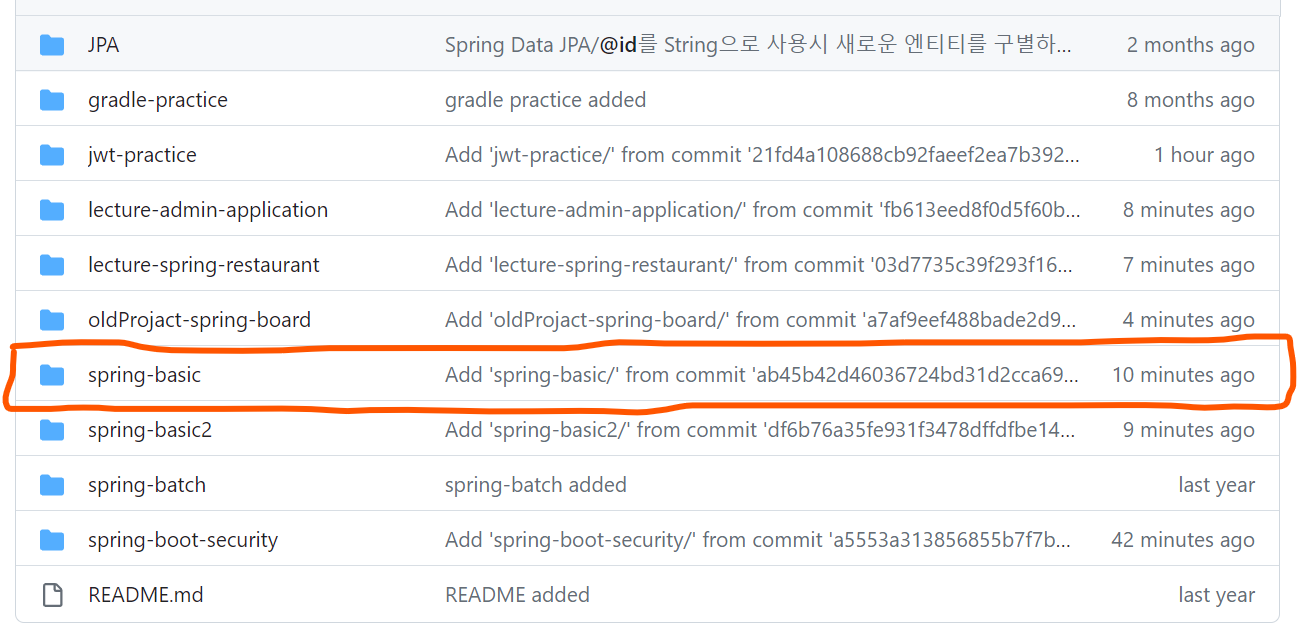
Subtree
상위 리포지토리에 하위 리포지토리를 두고 싶을때 사용했다. 상위 리포지토리에 명시될 이름으로 prefix에 작성해준다.
git subtree add --prefix=[상위 리포지토리에 명시될 이름] [하위리포지토리 git 주소] [하위리포지토리에서 가져올 branch 명]

ex) git subtree add --prefix=spring-basic https://github.com/furuemaker019/spring-basic.git master
GitHub and Remote Repository
Remote를 만드는 문법, push를 하기 위한 준비 단계
1
git remote add origin (repository URL)
Remote repository에 push
1
2
3
4
5
6
7
git push -u origin master

-u : Remote Repositiry에 최초 master branch를 push할 때 붙여준다.
     upsteam을 의미한다.

- origin : name of remote
- master : name of branch
강제 push
1
git push -f origin master
모든 branch들을 포함하여 push
1
git push --all
remote 확인
1
git remote -v
remote 변경
- Repository not found 에러 시 사용함
1
2
3
4
5
git remote set-url origin https://{git username}@github.com/{git username}/{repository name}.git

ex) git remote set-url origin https://futuremaker019@github.com/futuremaker019/TIL.git

로그인 화면이 나오면 해당 Repository의 계정으로 로그인을 해서 push한다.
pull 명령 실행시 이미 존재하는 두 프로젝트의 기록(history)을 저장하는 상황에 사용하는 명령어
- git에서 서로 관련 기록이 없는 이질적인 두 프로젝트를 병합할 때 사용한다.
1
git pull origin 브런치명 --allow-unrelated-histories
branch push
1
git push --set-upstream origin [branch 명]
에러 모음
File too long 해결한 명령어
1
2
3
4
5
git config --global core.longpaths true

or

git config --system core.longpaths true
Upsteam
- Upstream이란
- 다른 사람의 GitHub의 저장소를 Fork한 경우 내 Github가 origin이 된다. 처음 fork를 시도한 저장소를 upstream이라고 부른다. origin과 upstream 모두 romote 저장소이다. 보통 origin과 구분하기 위해서 upstream 이라는 명칭을 주로 사용한다.